Happy Halloween!

Halloween is one of my favorite times of the year. My son Jack and I love to decorate for the season and also plan an epic Halloween party. Every year I make new quilts, try new recipes, and find clever ways to sew for my party. I can’t wait to share some of those ideas with all of you!

Do you have a lot of scrap fabrics laying around? I definitely do! I decided to create a quilt pattern that uses just 2 colors (whatever colors you would like to use) to create a stunning quilt. In our example I used orange and black. I used up all sorts of Halloween fabrics that I had laying around. I also didn’t mind if some of my black fabrics had orange print on them or the other way around.

Here’s a look at what the quilt ended up looking like:
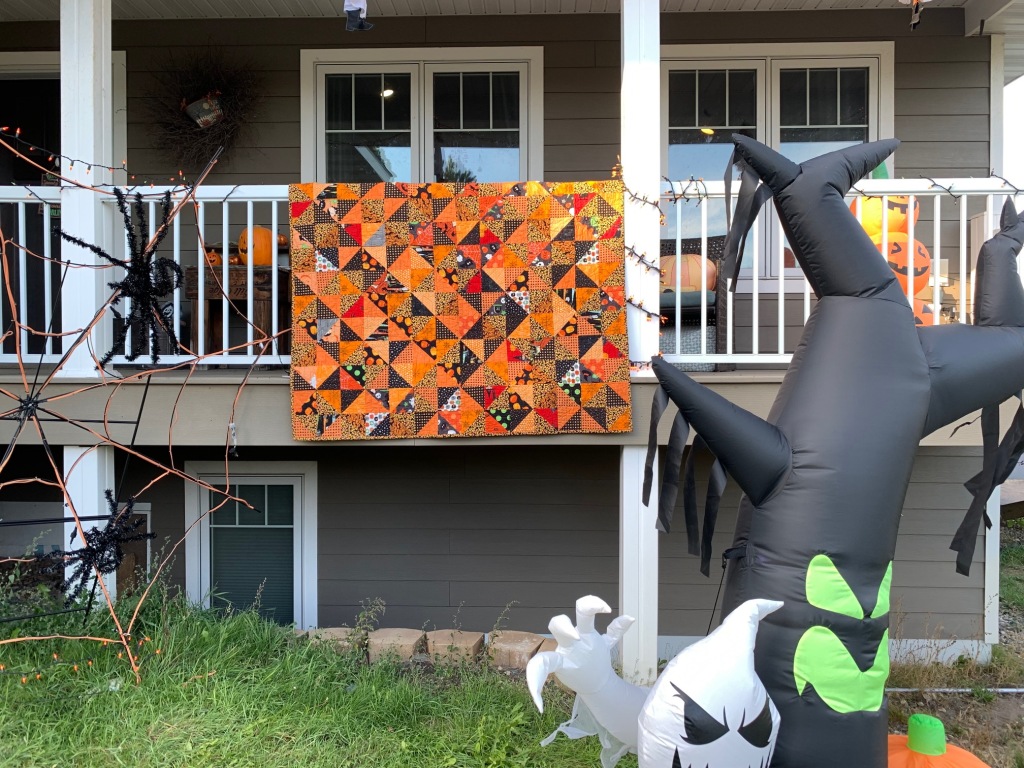
Scrappy Jack Quilt

This quilt is most striking from far away because that is when you can really see the design play.

I hope you enjoy digging through your stash to create this quilt. Here are the instructions:

I also love sewing with wool this time of the year. A black and cream color story are perfect for a more sophisticated Halloween and I love using toweling fabric and the background.
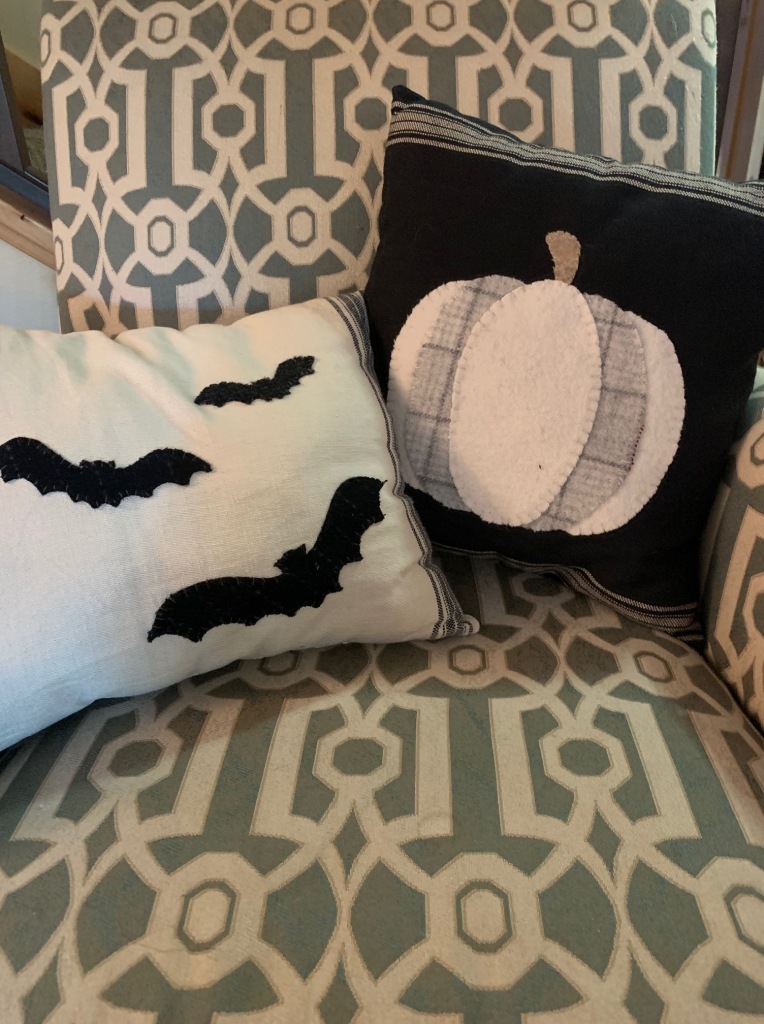
You’ll find the instructions for these pillows and witch hat runner here (the super cute mummy was an Indygo Junction pattern a number of years ago that I just had to make).

This year for our Halloween party I decided to make pillowcases for the guests to take home with them. I’ve made trick or treat bags and other small things over the years, but settled on pillowcases because they have a dual purpose. They can be used in their traditional format on your bed or you can attempt to get the most candy ever if you use them as your trick or treat bag on Halloween!

I created a fun printable tag and a little sign to hang by the pillowcases for guests to take as they leave the party.
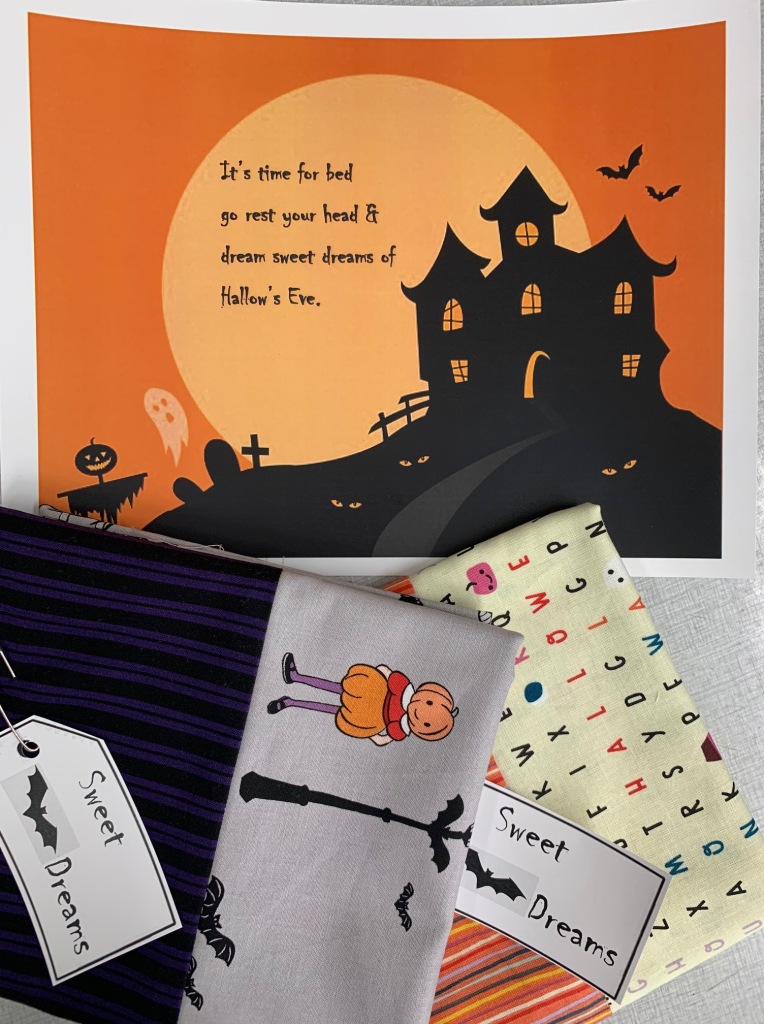
I’ve included those printables for you to use as well.

My absolute favorite pillowcase instructions are from the www.allpeoplequilt.com website. It’s called the Roll It Up Pillowcase pattern, and I love that all of your seams are encased meaning no fraying threads as you wash your pillowcases!

This year I also tried a new drink recipe from www.thesweetestoccasion.com it is Caramel Apple Sangria. It was so easy to make ahead, which I love when you’re planning a party.
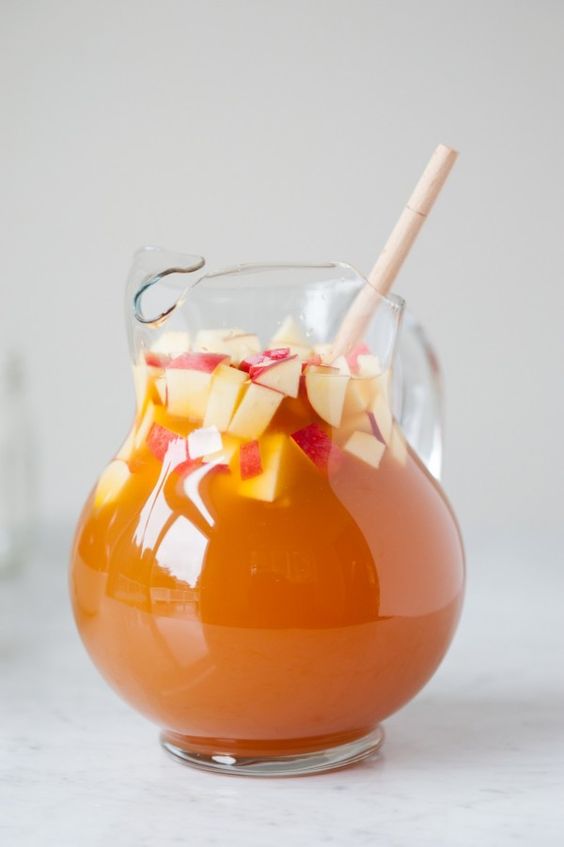
Check out the full recipe on her blog, but here are the basic ingredients:

5 ingredients

Produce

  • 4 Apples

Condiments

  • 1/4 cup Caramel syrup

Drinks

  • 8 cups Apple cider, fresh

Beer, Wine & Liquor

  • 1 cup Unflavored or caramel vodka
  • 1 1 liter bottle White wine

Here is a link to her full recipe: https://thesweetestoccasion.com/2015/10/caramel-apple-sangria/

I hope you’ve enjoyed some of my Halloween magic for this year. I can’t wait to celebrate the holiday with my family and friends!

What’s your inspiration?

Most people have one shadow, I usually have two.  The only way I am able to find time to sew is when I can also find something for my girls to do nearby.  I spend most of my day with the littlest, Lola, at my side.  When school is out, we are joined by Isabelle.

My sewing room is cluttered with toys, ready to inspire them to play.  I decided along time ago that the mess was totally worth the reward of having time to sew.  I’m also pretty lucky to have a large sewing space that doesn’t need to look perfect on a daily basis.

This past month I’ve had a number of sewing deadlines to meet including finishing up the instructions for my 2017 Fabric Fan Club Sampler Quilt.  It is being quilted as I type and I will share a picture next month.  If you’re in the Club you’ll get your finishing instructions in your February shipment.

Curious about what the Fabric Fan Club is?  I started it 3 years ago as a monthly fabric subscription and it has evolved through the years.  Next year I’m launching the Scrap Sewciety as the 2018 Fabric Fan Club.  I know we all have plenty of scrap fabrics sitting around.  And I’m guessing, if you’re like me, you have very good intentions on using them.  With the 2018 Club I plan to take you on a year long journey through your scraps.  I will be designing 4 brand new quilt patterns that will utilize your stash.  Each month you will get sent on a little mission into your scraps to find fabrics that we will incorporate into the quilts.

The other really fun part of the Fabric Fan Club is that I also select a small gift that I send with your shipment each month.  Oh and don’t forget about the fabric! What kind of Fabric Fan Club would it be if you didn’t also get fabric? Each month you’ll also get a fat quarter of fabric.  If you are interested in joining me in 2018, the first shipment will be March 1st. You can register on our website, http://www.baywindowquiltshop.com

This year we decided to offer a new type of Block of the Month program called Inspiring Stitches.  It’s actually a calendar for 2018 that has instructions for each month of the year.

We loved this idea so much we made up two different versions- dark or light. Full disclosure here, I didn’t sew them.  A huge thank you to Missy Stine for making both models!!

Each month the designers will be sharing additional patterns that feature the month’s block (with the exception of this month). So look for a new blog post from me each month that includes a link to that pattern.  You will need the calendar to complete each project (it will give you the first set of instructions).

Here’s a look at the January block in both colorways:

One of the things I love most about this sew along is that you can honestly start any time.  You only have to make a few blocks each month which means it will be easy to get started whenever you want.

You can find kit information and the calendar on our website.

As January comes to a close I am excited for what February will bring: a new View From Bay Window issue, the start of Schoolhouse class preparations, our annual Liquidation Sale at the PACC, plus who knows what else will inspire me to create!  Happy sewing- Katie


Week Four- Moda Sampler Shuffle!

Happy Thanksgiving everyone! I know the holidays mean we are all a bit busier, so I decided to post week four a little early.  It will give you a couple more days to sew if you get the chance.

week four picThis week was all about the fabric for me.  I decided to add in a few of my favorite fabrics, some of my own designs, to make it more personal.  Whenever I am sewing for myself or my family I try to add in at least one of the fabrics I’ve designed.  It doesn’t always work, especially if I am sewing with a certain theme like Christmas since most of my fabrics have been brights and baby colors.  The last project that I made was a quilt for my daughter Izzy.  She had helped pick out most of the fabrics and when it was completed she looked at me and said, “why is there baby fabric in my quilt?”  I had used a small strip of pink rattles fabric in her scrappy binding.  I couldn’t believe she picked it out so quickly.  When I told her it was one of my fabrics she was fine with it!

In Block 10 I used the orange words fabric from Giggle & Grow along with the Zen Chic fabrics I’ve been using all along.

Moda Sampler Shuffle Block 10

Moda Sampler Shuffle Block 10

I loved making this block, designed by Deb Strain.  It was quick and easy and showcased the fun fabrics.  I found that if I pressed all of my seams to the light fabric, it fit together perfectly.

Click on the link below to download Block 10

my_sampler-shuffle-block10

When I got to block eleven I was a little nervous.  I had never tried piecing a block together like this one before.  The instructions were good, and I just took it one step at a time.  In the end I had a blast making this block.  I definitely learned a new piecing trick with this one.  Who knew you could lay a pieced triangle unit on a square and end up with such a cool design.

Moda Sampler Shuffle Block 11

Moda Sampler Shuffle Block 11

So much fun to try new things! Click on the link below for the Block 11 pattern designed by Brenda Riddle Designs.

my_sampler-shuffle-block11

And finally, Block 12- this one was a bit harder for me to keep accurate.  There are a lot of seams in this block.  I definitely pressed a few of them open to reduce the bulk.  One thing I love about this block is the fun you can have with color placement and value.

Moda Sampler Shuffle Block 12

Moda Sampler Shuffle Block 12

I used another one of my fabrics, the blue words from Giggle & Grow, and a wild background fabric.  When you look at the pattern you’ll see that they also show you what it would look like if you reversed the values and used a dark fabric as the background and a light fabric as the print.  Play around with what you want to do.  I’m sticking with all lights for my backgrounds because I think it will work better in the finished quilt that I envision, but there’s no right or wrong way to make this quilt.  If you search for the hashtag #modasamplershuffle on Instagram you’ll see lots of variations that people are coming up with.

Click on the link below to download Block 12 instructions designed by Zen Chic.

my_sampler-shuffle-block12

Happy sewing everyone, we are almost halfway through our sew-along! – Katie

Week Two- Moda Sampler Shuffle

Hello week two! How’s your sewing going? Did you get started yet on on the blocks for week one? I had a couple people ask me about fabric requirements.  I don’t have a great answer for this yet, but I do have a couple suggestions.  Moda recommended purchasing a layer cake and jelly roll to get a lot of variety in your prints.  Then you’ll need to add to this for setting squares and the border strips.  I’ve found in piecing the first 6 blocks that I am using a very small amount of fabric in these blocks.  I also want to wait until my blocks are all done before I decide what I am going to use for the setting squares.  The quilt is set with alternate blocks next to the pieced blocks.  I think I might use one fabric or many fabrics… that will have to wait until I can lay them all out and see what looks best. So, I’m just using 1/4 yard cuts from fabrics I like in the line For You & Modern Backgrounds by Zen Chic. I think part of the fun of this sew-along is that I don’t know what my quilt will look like until it’s all done.  I hope you can handle the mystery of it all, but if you really can’t search for the hashtag #modasamplershuffle and see if you can find any posts that include a picture of the finished quilt.

Here is a link to the final setting instructions in case you want to get an idea of how the quilt will be laid out in the end.

sampler-shuffle_pattern

modasamplershuffleHere are the three blocks that you get to make this week!

At first glance they all looked quite easy.  I thought maybe I was in for a quick sewing week and I was, but don’t let those simple shapes fool you.  There are a lot of ways to check your accurate piecing in these three blocks.

Block 4 was designed by V and Co and was pretty fun to make.  I enjoyed the simple design because it allowed me to see if my 1/4″ seam was correct.

Moda Sampler Shuffle Block 4

Moda Sampler Shuffle Block 4

This block will turn out better if you pay attention to which direction you press your seams.  Because of the layout of the pieces, if you press towards the dark fabric each time your seams will always alternate when it comes time to sew together your block.

Click on the link below for the Block 4 Instructions

my_sampler-shuffle-block04

Block 5 is one of my favorite blocks of all time! This one was designed by Kathy Schmitz Studios and is a great way to showcase a fun background print.

Moda Sampler Shuffle Block 5

Moda Sampler Shuffle Block 5

I must admit that those Easy Corner Triangles are one thing I have a hard time keeping accurate.  Especially when it comes to leaving a 1/4″ seam allowance around the outside of my block for when I sew the blocks together into my quilt.  I did okay on this block, but do have a suggestion if you also run into this problem.  In the pattern they have you sew two squares 2 1/2″ together using the Easy Corner Triangle method for the 4 corners.  You could sew together bigger squares to start with and then trim them down to a finished size of 2 1/2″.  This will help if your corners tend to want to pull when you press your triangles or if you have a hard time keeping it square when you sew.

Click on the link below for the Block 5 pattern

my_sampler-shuffle-block05

And finally Block 6- deceptively tricky thanks to the flying geese units for the star points. Here again, I always run into the problem of not having perfectly accurate points on my flying geese units.  I know many people also have this problem and that is why they prefer to make flying geese with one of the many rulers that are available on the market.  I’ve never been one to use specialty rulers so I don’t have a suggestion for which one you should use, but I’ve heard from many people who each have different ones they like.  Some examples include: Quilt In A Day Flying Geese Rulers, Flying Geese x 4 by Lazy Girl, and Flying Geese Ruler by Marti Michelle.  I may look into these, considering we need to make so many Flying Geese for the Inner Border on our quilt and get back to you!

Moda Sampler Shuffle Block 6

Moda Sampler Shuffle Block 6

What I do love about this block designed by American Jane is the fun play of color thanks to the 4 patch center on the star.  I made sure to toss the direction of my pink fabric since I knew I didn’t want to try and have them all going the same direction.  Remember not to pull while pressing your block and you’ll have better luck with your triangles being the size you want.

Click on the link below for the Block 6 pattern

my_sampler-shuffle-block06

Don’t forget to sew some of your Flying Geese units each week so that you’re ready to put together your quilt when we get to the end.  We’re going to need 44 of them!! Until next time, happy sewing~ Katie